RubyMineでRailsデバッグ環境構築
概要
RubyMineでRailsデバッグ環境を構築する手順です。
【Windows7】VirtualBox + Vagrant + Ruby + Rails4 開発環境の構築【初心者必見】 - Qiitaの記事を参考にしています。
Railsの環境構築
以下の手順でRailsアプリをホスト側のブラウザで表示することができます。
参考情報
仮想環境構築
仮想環境は、VirtualBox/vagrantで行いました。
- VirtaulBoxインストール
- vagrantインストール
- OSインストール
Centos6.5をインストールしました。
Railsアプリ環境構築
- 開発用パッケージインストール
# yum update
# yum -y install git gcc make openssl-devel zlib-devel readline* gcc-c++
# yum -y install nodejs
# yum -y install sqlite-devel
2.2.2をインストールしました。
$ git clone https://github.com/sstephenson/rbenv.git ~/.rbenv
$ echo 'export PATH="$HOME/.rbenv/bin:$PATH"' >> ~/.bash_profile
$ echo 'eval "$(rbenv init -)"' >> ~/.bash_profile
$ source ~/.bash_profile
$ git clone https://github.com/sstephenson/ruby-build.git ~/.rbenv/plugins/ruby-build
$ rbenv install -v 2.2.2
$ rbenv rehash
$ rbenv global 2.2.2
4.2をインストールしました。nokogiriのインストールでエラーが出たので、nokogiriを最初にインストールしました(以下の記事参照)。
# yum -y install libxml2 libxslt libxml2-devel libxslt-devel
$ gem install nokogiri -- --use-system-libraries
$ gem install rails
$ gem install bundler
Railsアプリ実行
Railsアプリがホスト側のブラウザに表示されなかったので、起動オプションを追加しました。
- Railsアプリ作成
$ cd /vagrant
$ rails new sample
$ cd sample
$ rails g scaffold Twitter tweet:string
$ rake db:migrate
ポートフォワード設定を行います(必須ではありません)。
$ cat Vagrantfile
config.vm.network :forwarded_port, guest: 3000, host: 3000
開発環境であればファイアウォールを無効にしても良いと思います。
# vi /etc/sysconfig/iptables
-A INPUT -m state --state NEW -m tcp -p tcp --dport 22 -j ACCEPT

この行を追加
-A INPUT -p tcp -m tcp --dport 3000 -j ACCEPT

-A INPUT -j REJECT --reject-with icmp-host-prohibited
# /sbin/service iptable restart
ブラウザ(ホスト側)で表示できませんでした。rails 4.2から起動オプションの追加が必要です。
$ rails server -b 0.0.0.0
RubyMineによるRailsデバッグ環境構築
ruby-debug-ideのインストール(リモート側)
デバッグ用gemを追加します。
$ cd /vagrant/sample
$ vi Gemfile
gem 'ruby-debug-ide'
gem 'debase'

$ bundle install
sampleアプリの起動
デバッグ待ち状態になります。
$ cd /vagrant/sample
$ rdebug-ide --port 1234 --dispatcher-port 26162 --h 0.0.0.0 -- bin/rails s -b 0.0.0.0
RubyMineの設定
Run-Edit ConfigurationsでRuby remote debugを追加。remote root folderとlocal root folderを設定する。Server commandをsampleアプリ起動コマンドと合っていることを確認します。
デバッグ実行
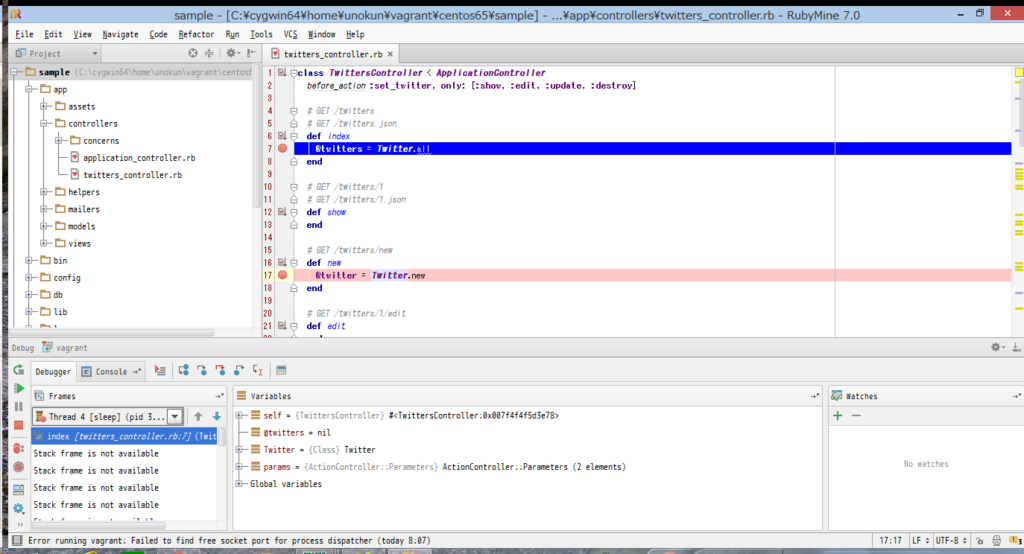
ブレイクポイントを設定して、RubyMineでRun-Debug xxxを実行します。リモートでRailsアプリが起動します。
ブレイクポイントで停止すれば成功です。
「Getting undefined method for nil:NilClass」というエラーがブラウザに表示された場合には、byebugというgemをコメントアウトするとうまくいくかもしれません。
$ cat Gemfile
group :development, :test do
  # Call 'byebug' anywhere in the code to stop execution and get a debugger console
  #gem 'byebug'
